Wall Stenciling with Royal Design Studio

TOOLS
Curious about wall stenciling? Well read on for my detailed account on this fun project! For the longest time, I have had a love/fear relationship with wallpaper. I have drooled over plenty of wallpaper patterns from botanical, Moroccan, geometric to tribal. The problem is, I am seriously afraid of wallpaper. I don't know the first thing about installing them. I am fully aware that we are at a time where Googling or Youtube-ing a how-to video is easy. But I am sure that the folks involved in making that video have experience in installing wallpaper and they are bound to make it look easier than it actually is. I wasn't willing to risk wasting money on rolls of paper and all the extras required to put them up. They're not that cheap and I needed a quick and affordable way to create a fun accent wall in my bedroom. I originally wanted a mudcloth patterned wallpaper and loved the texture it would provide to my already blue wall. So I decided to use wall stencils! I chose Royal Design Studio for their wide selection of stencil designs and very helpful tips on getting started. Their website has everything you need to help you with your project including tools and thorough instructions via their blog, Paint and Pattern and Youtube channel.

#2 Stencil Brush from Royal Design Studio
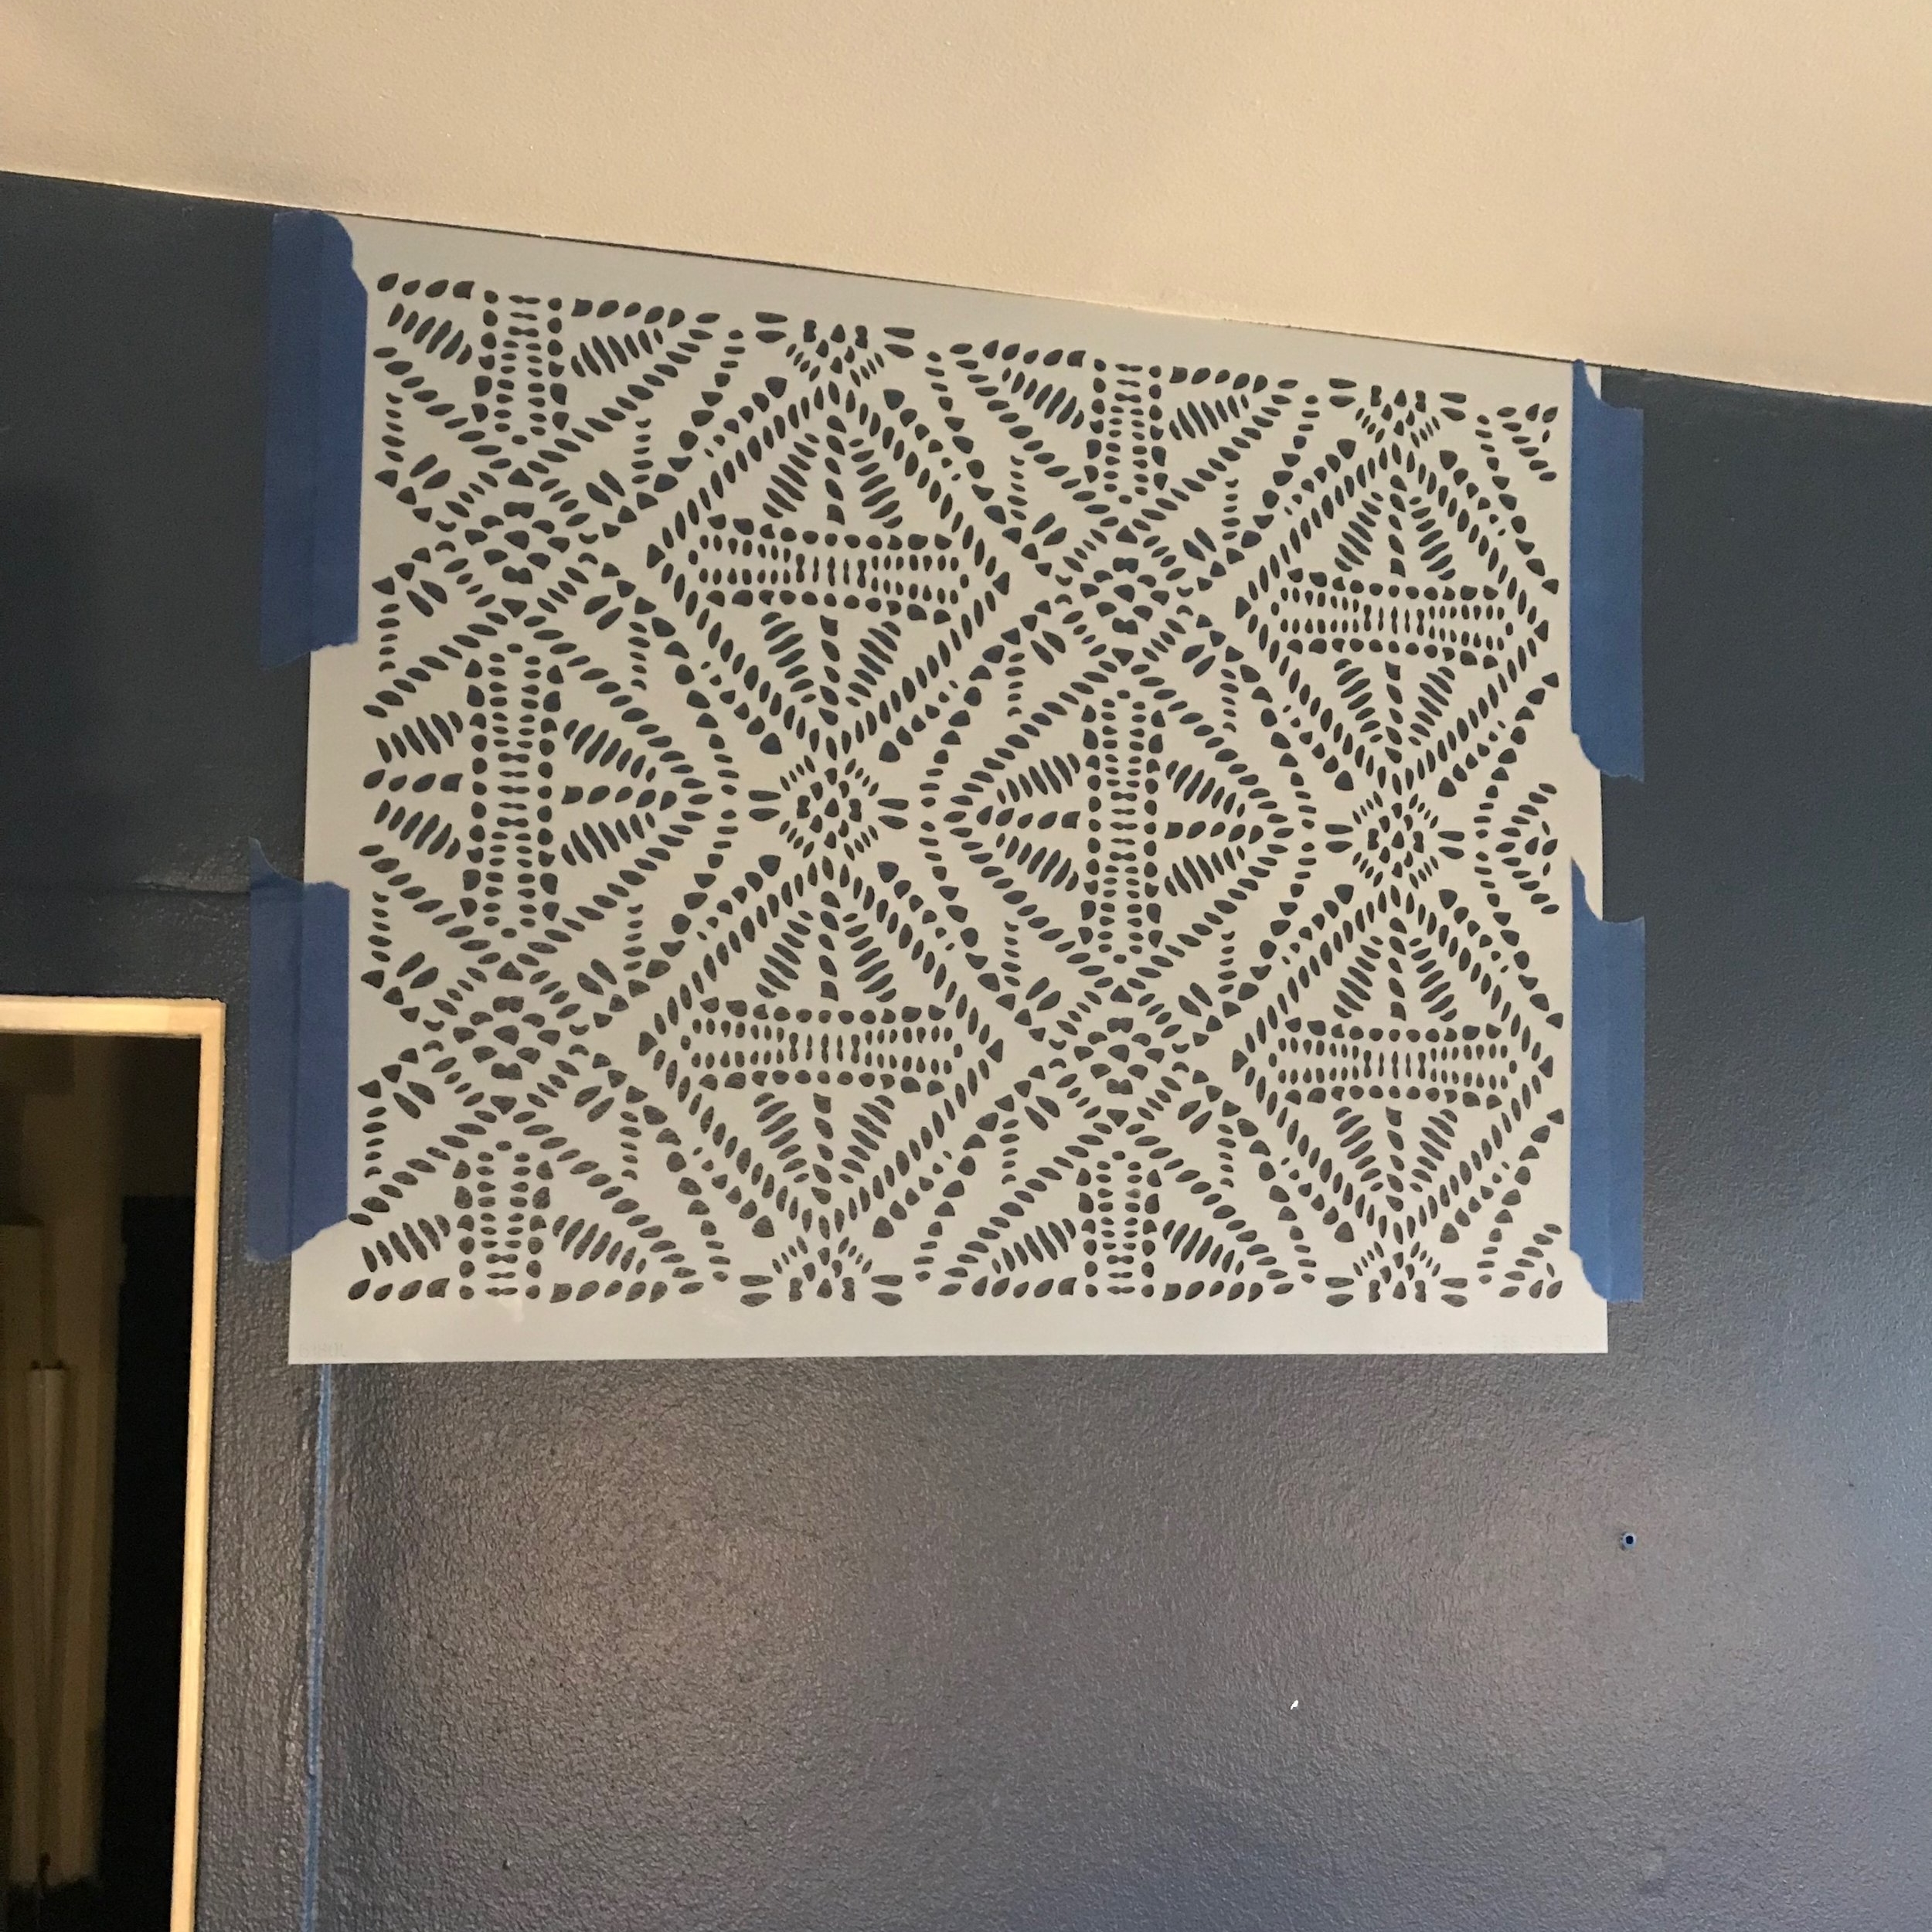
I won't lie and say I was fully excited about doing this. I was seriously nervous about messing it up but I reminded myself that paint is easy to fix if I did make a mistake. I chose to do my bedroom wall because I still have leftover blue paint from when we first painted the room and it will be cheaper to fix that way. It took me quite a long time to decide on a pattern. I had countless of tabs open on my browser comparing all the awesome stencils they had available. In the end I chose the African Tribal Batik Allover Stencil. I have two reasons for choosing this. One, it was as close to the mudcloth pattern like I originally wanted with wallpaper. Two, the pattern involved a series of dashes that I felt was very forgiving for someone who was doing this for the first time. A geometric or tile pattern would require clean, straight lines that a newbie like me wouldn't be able to achieve. I thought possible mistakes made on a pattern like this would add texture and make the whole design look like a screen printed textile which was the exact look I was going for.
I watched as much of the Youtube videos and read threads on the blog until I was confident enough to begin. As recommended on their blog, I purchased a small 8oz. sample pot of Behr Premium Plus Ultra from Home Depot which was around $4. The small container was more than enough paint to cover my wall that was roughly 8 feet tall by 12 feet long.The blog also recommended the use of a spray adhesive to secure the stencil on the wall as you painted. I chose to forego this tip and used regular painter's tape instead. I will say that the spray adhesive would be VERY helpful and I do wish I had used it but as I mentioned above, the uneven patterns created by not using spray adhesive lent to the rough, overall look of my design. This worked out for me since that was what I was going for anyway. If you chose a pattern that requires clean lines, then I highly recommend using a spray adhesive. Without it, the stencil kept shifting as I painted over it with the brush.
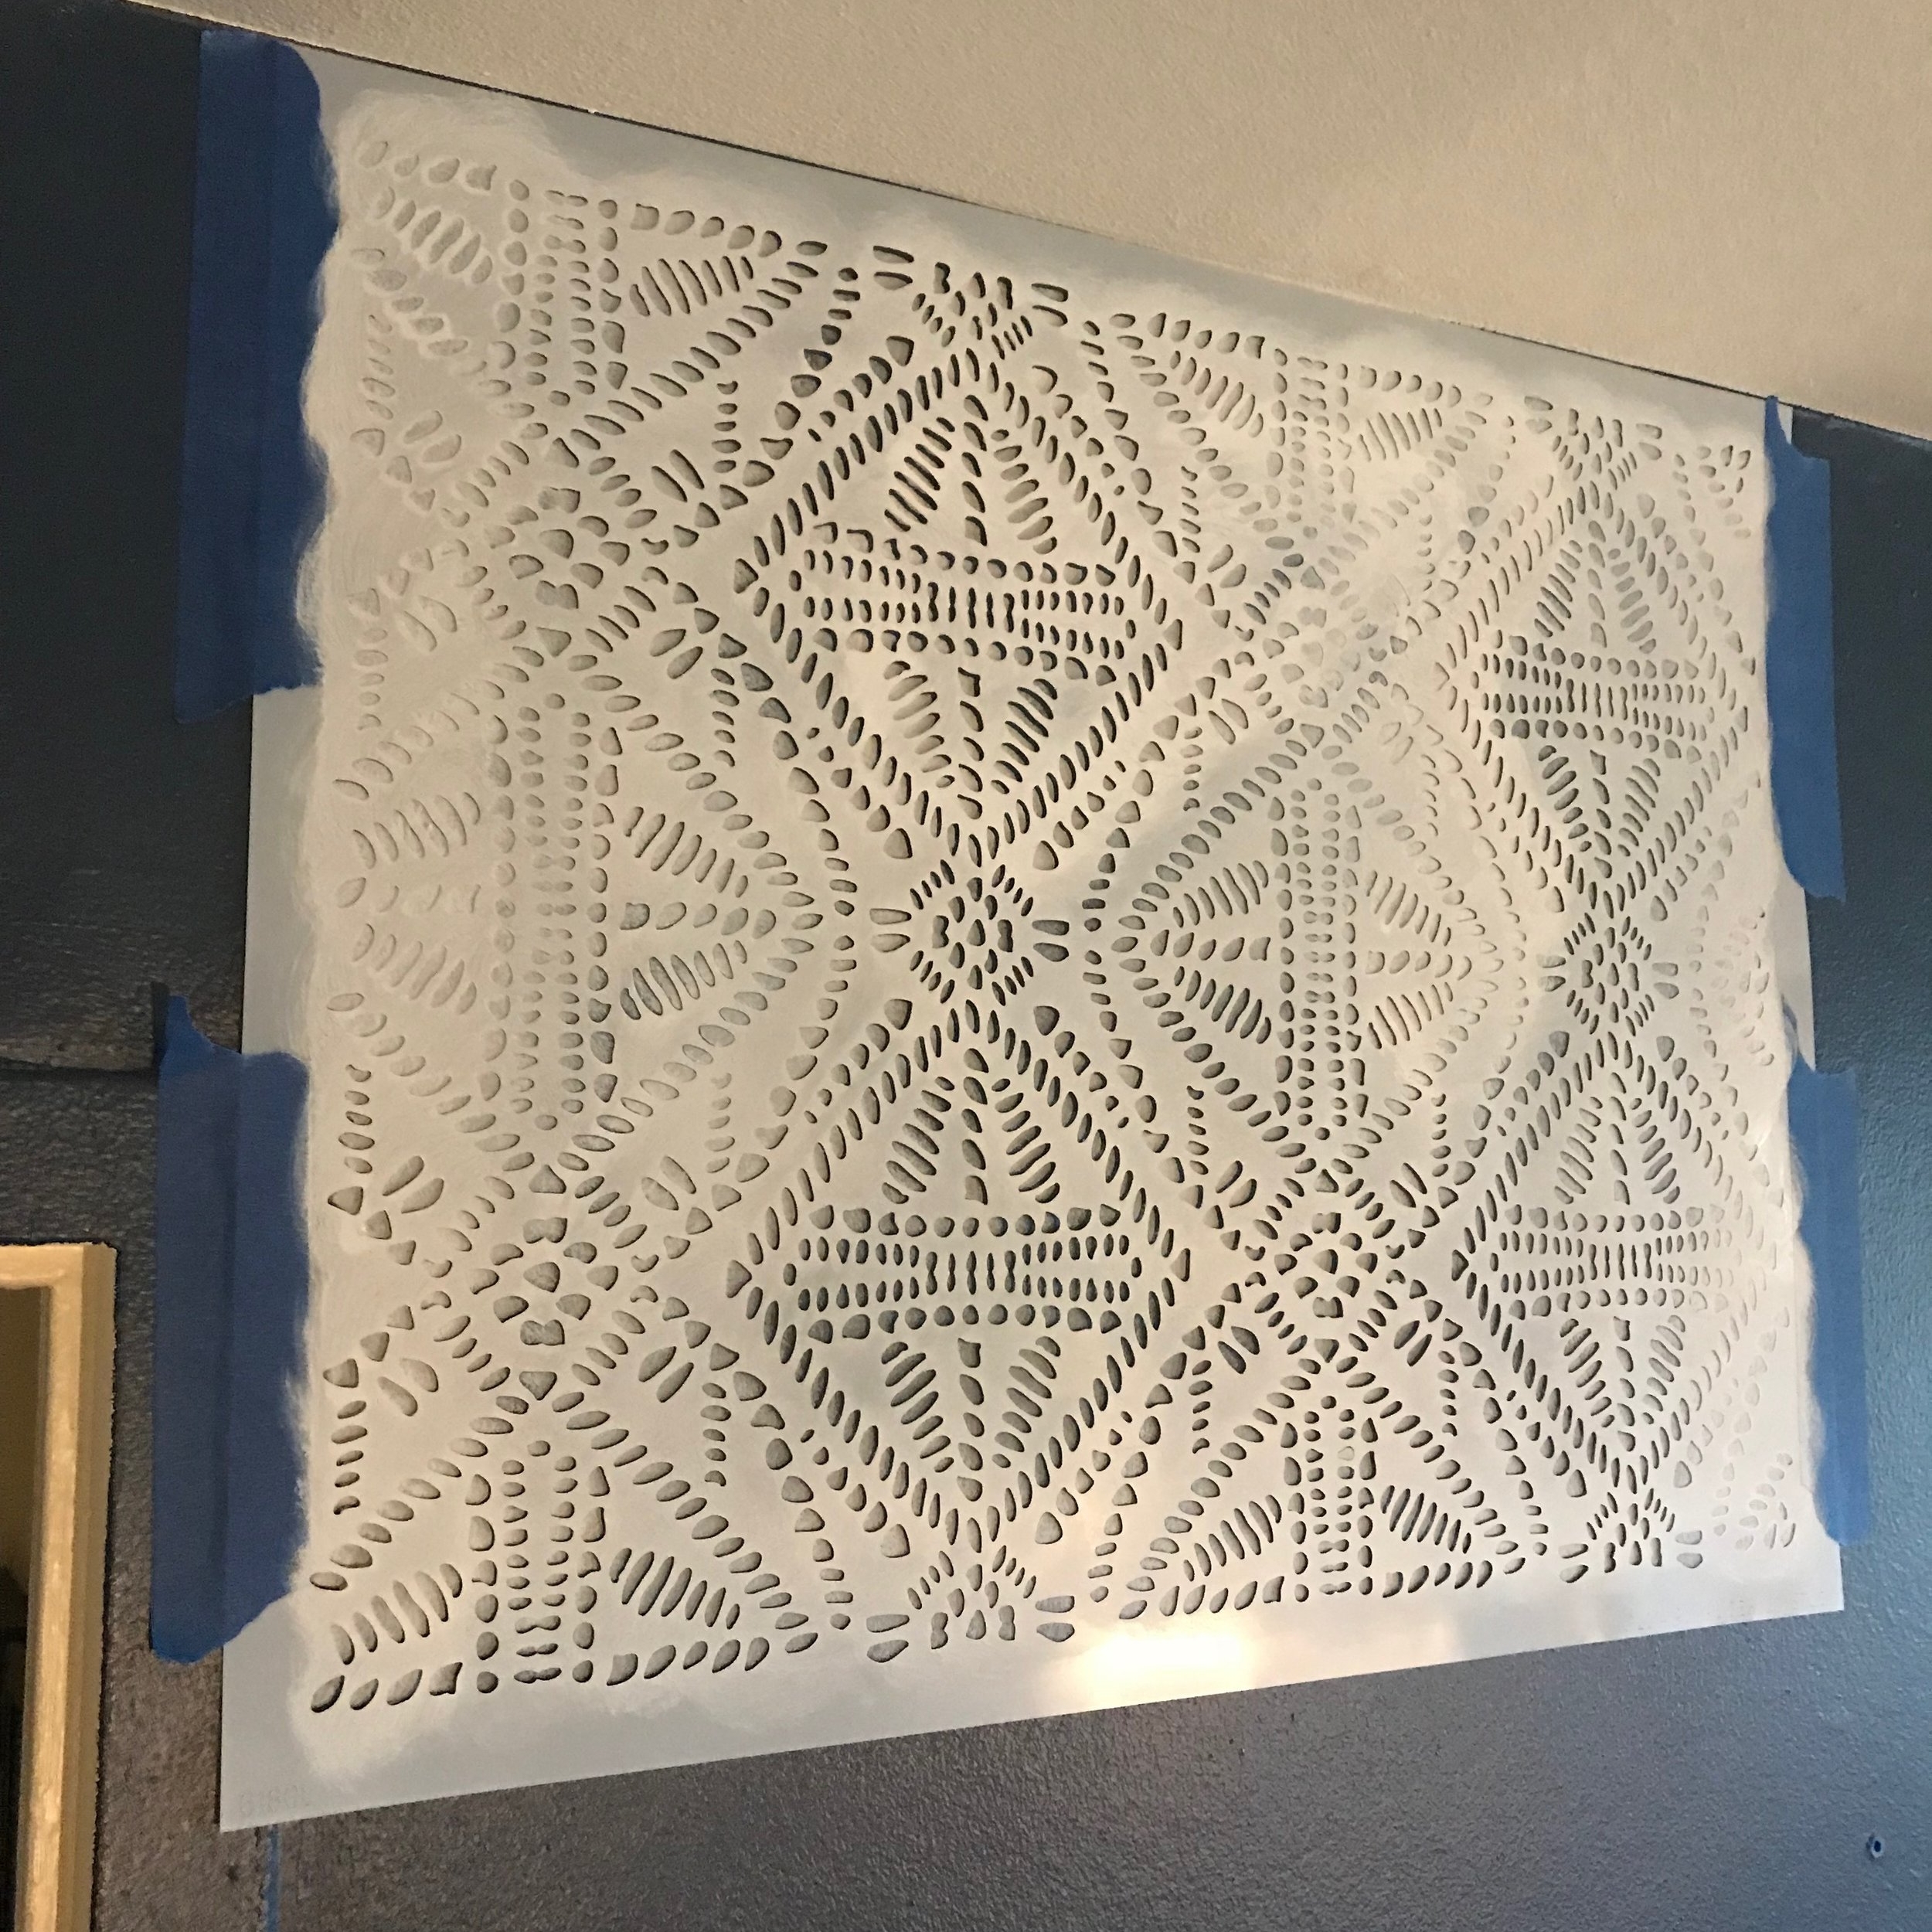
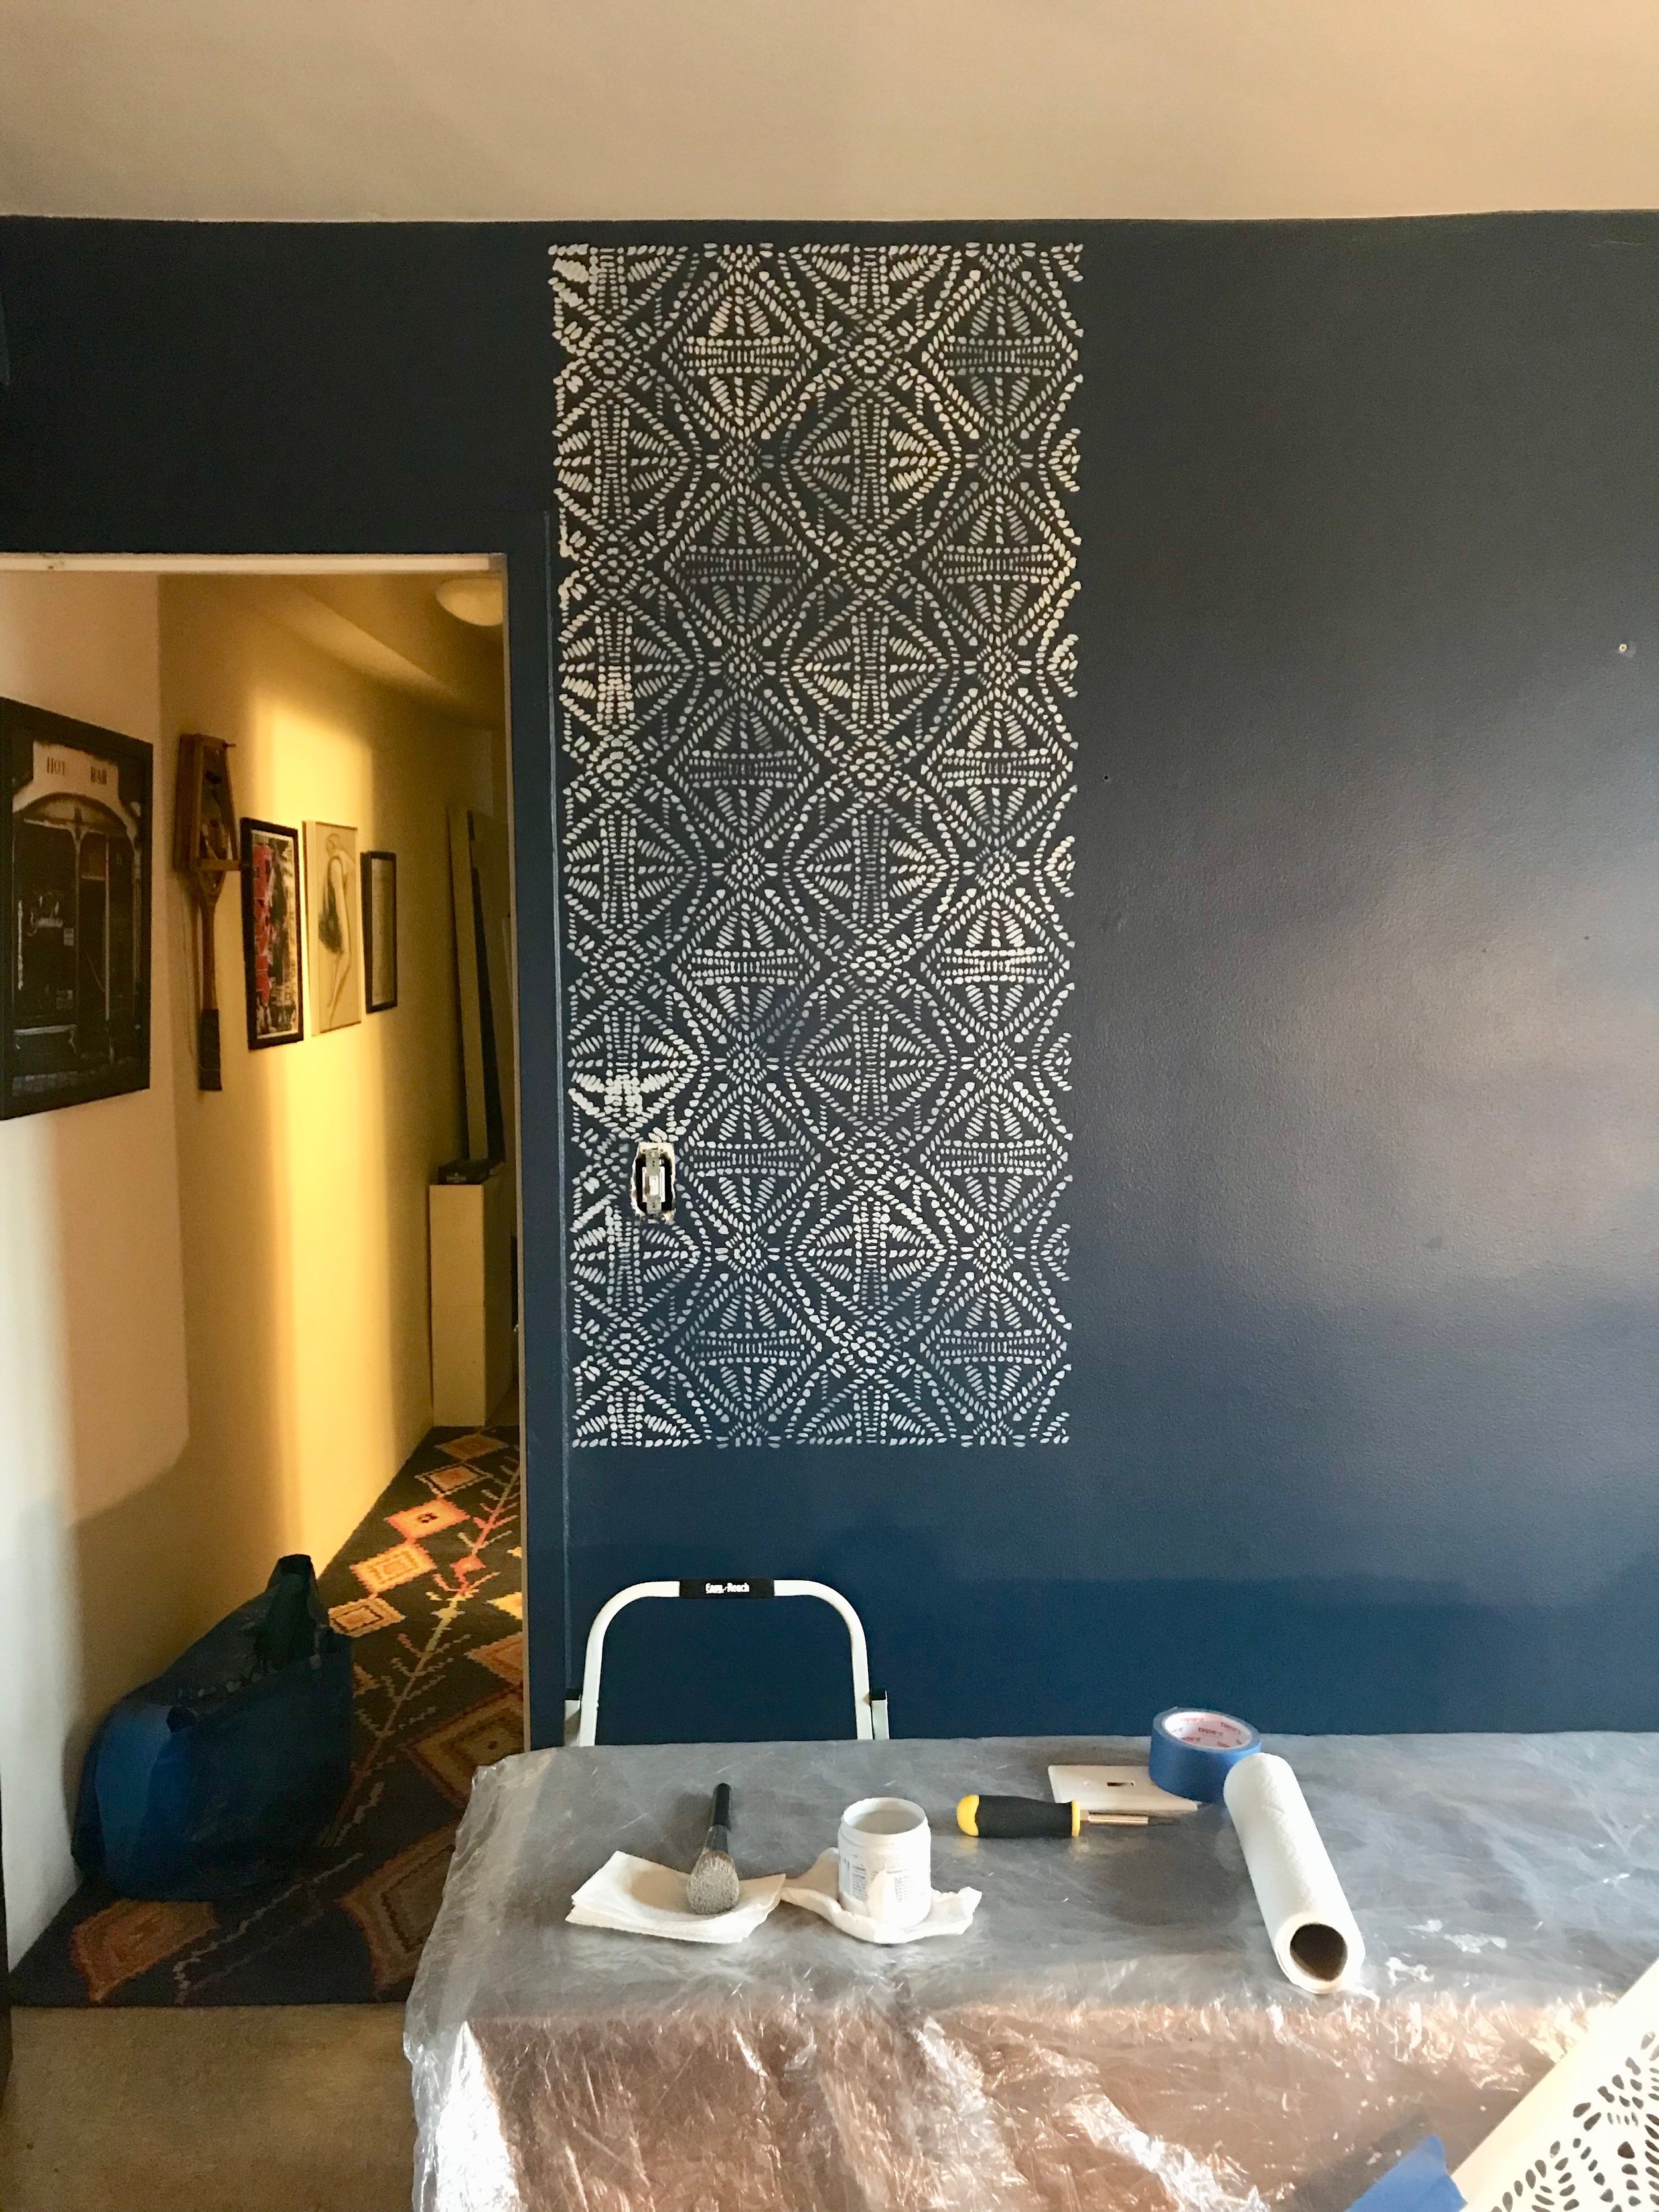
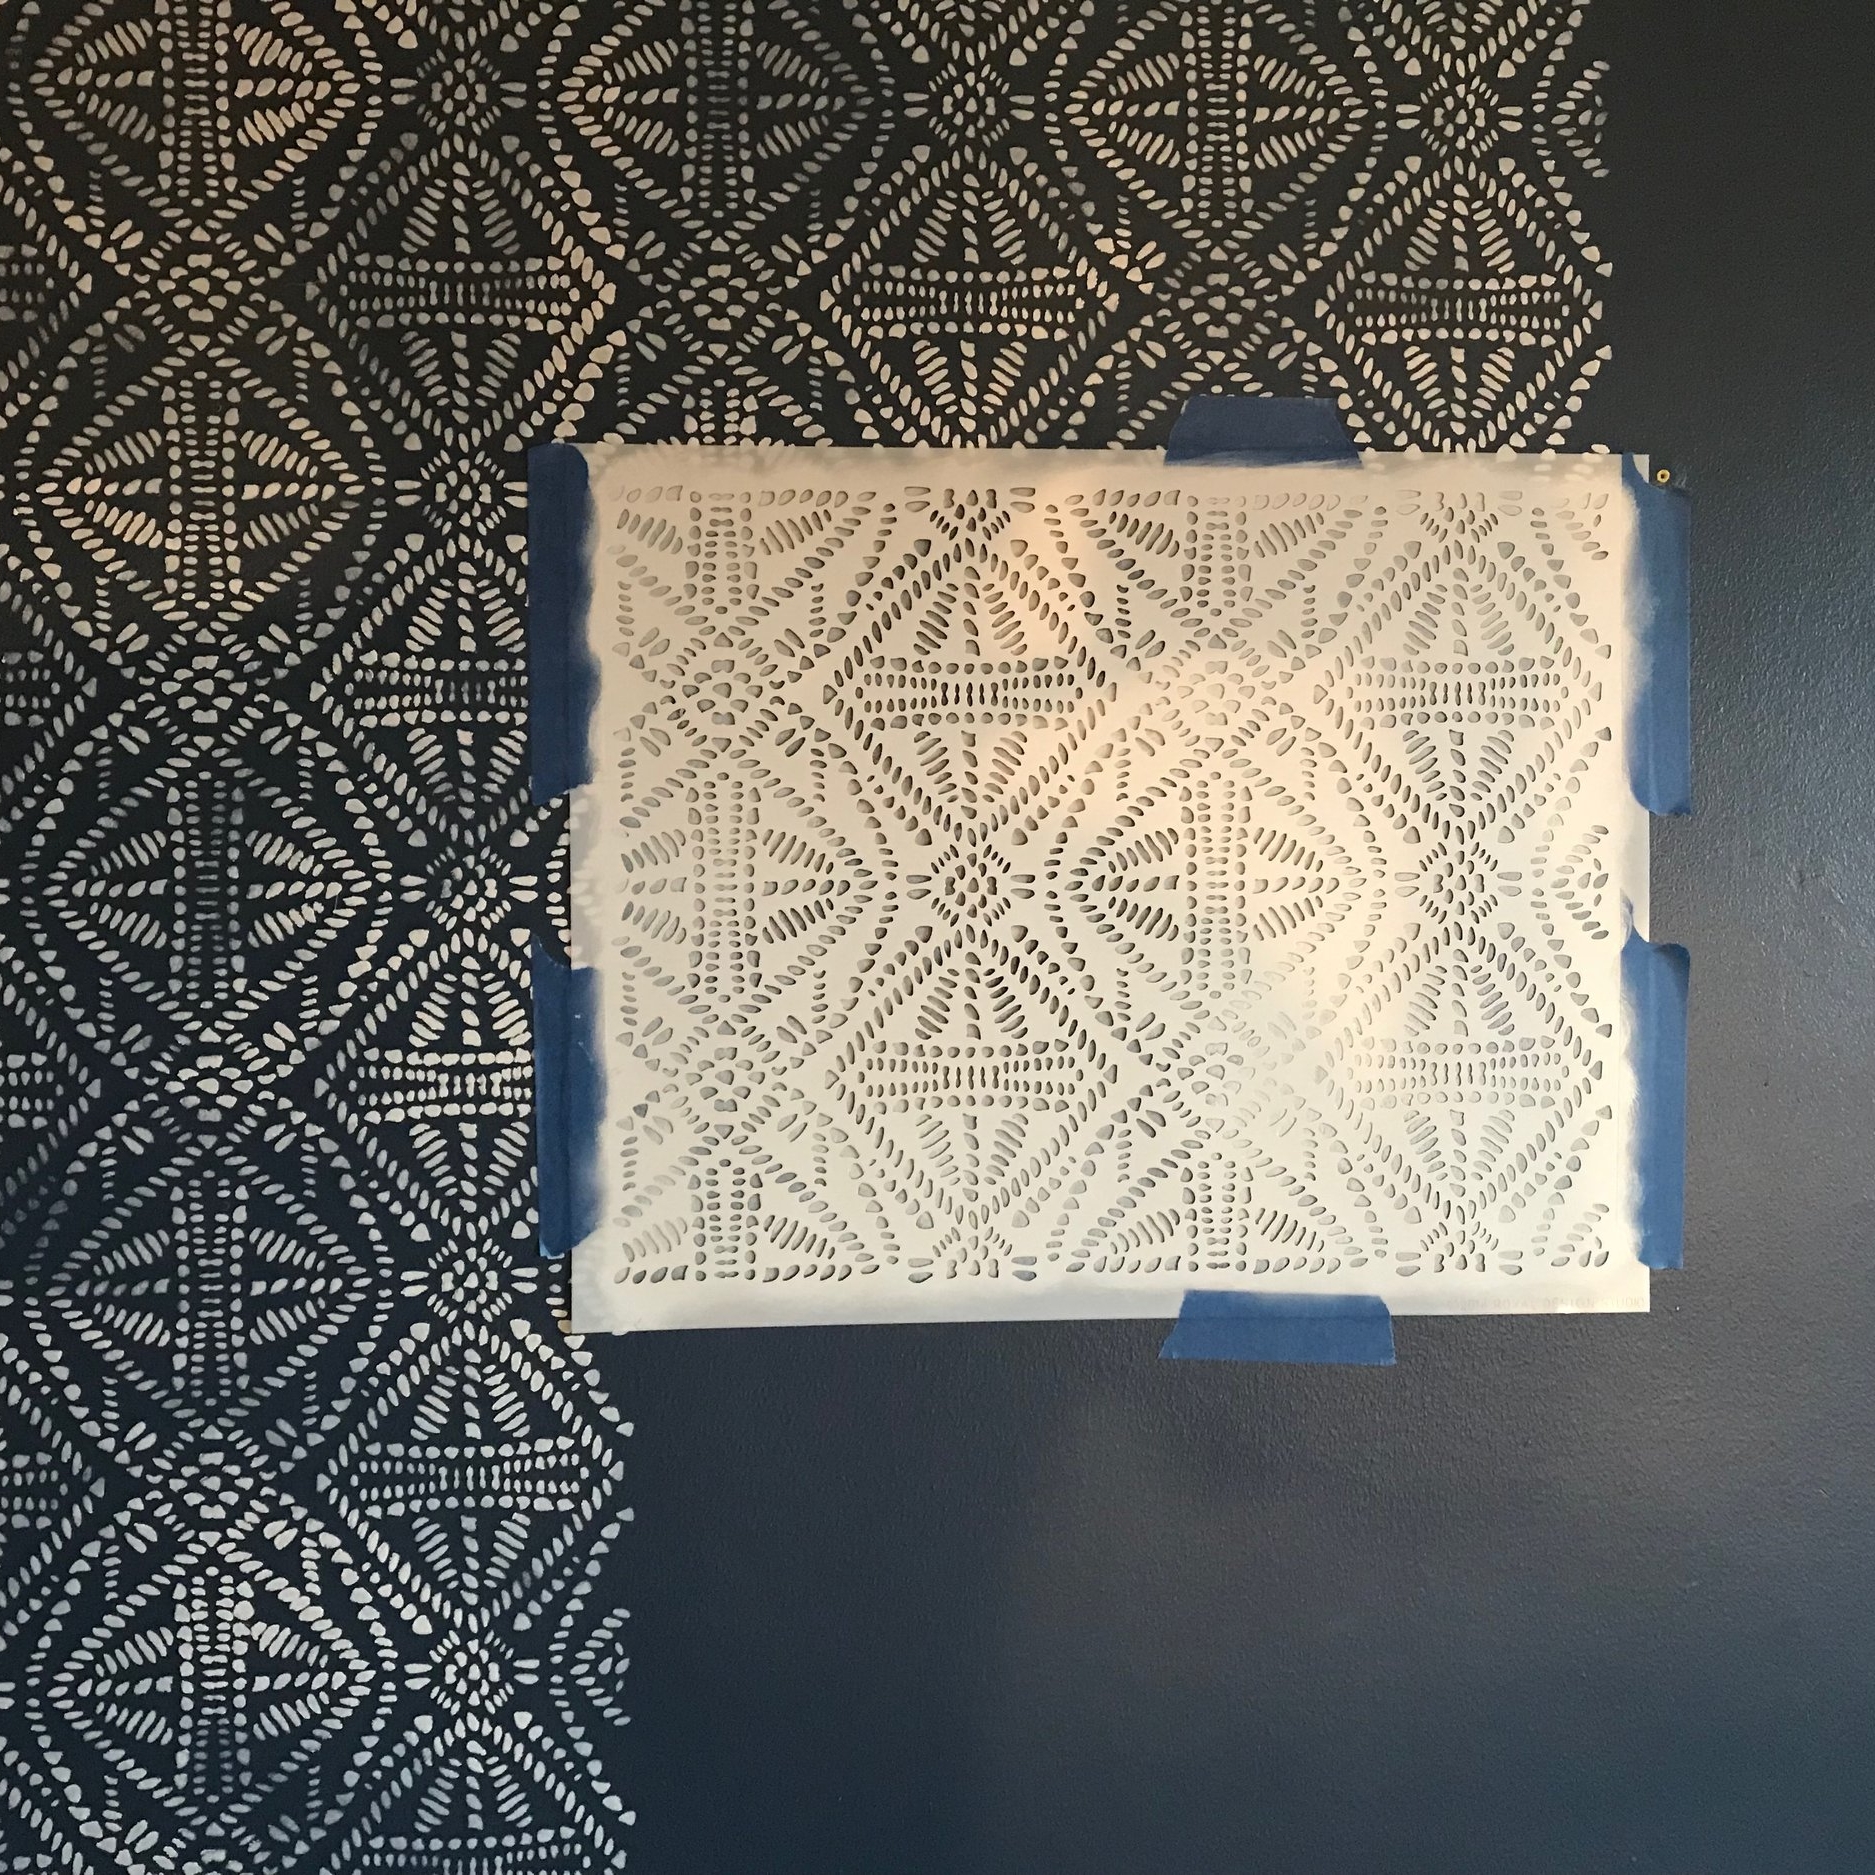
I was warned by people of the arm workout involved in a project like this and they weren't kidding. Also, painting along trim, around corners and light switches were a real pain. I chose to use a #2 stencil brush instead of a roller because the texture achieved by using the brush was just the effect I needed. I have to stress how VERY important it is to off-load your brush or roller every time before painting to reduce the risk of drips. I was guilty of not doing this and ended up with quite a few drips and smears. But the design was forgiving and the mistakes blended in like it was intentional. Off loading is the process of rubbing excess paint off your brush onto a rag or paper towel before running it over the stencil.
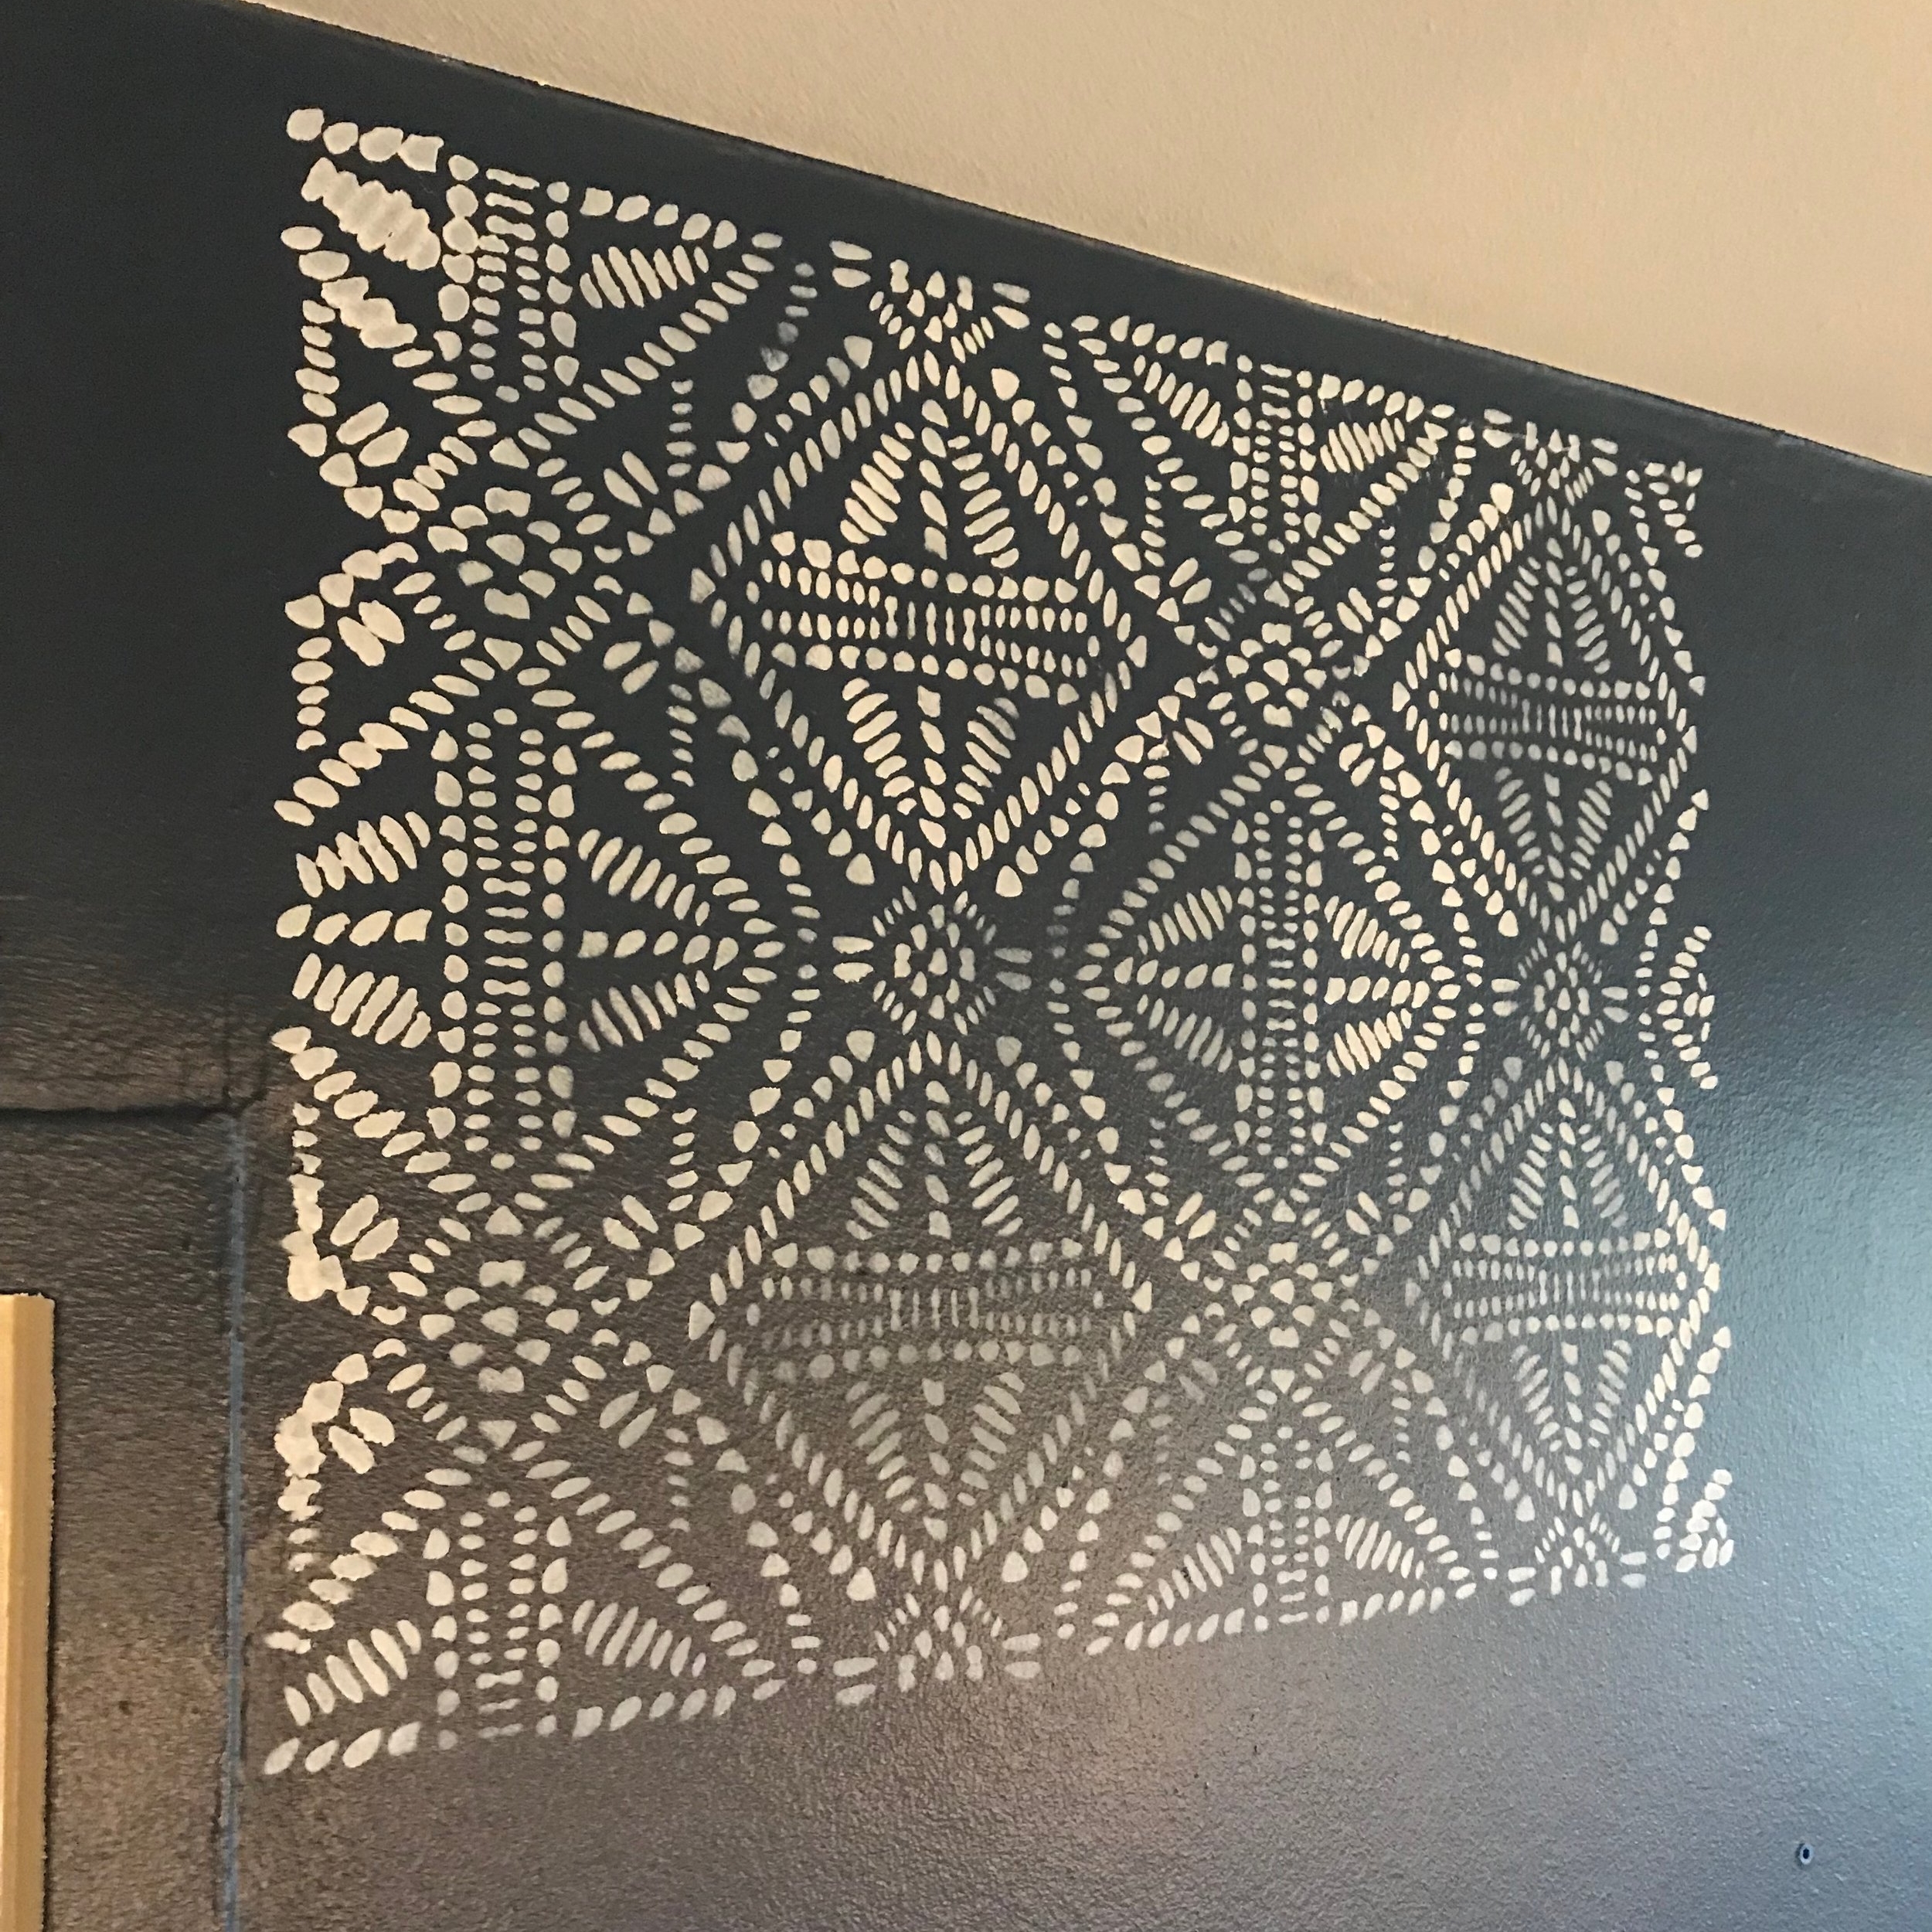
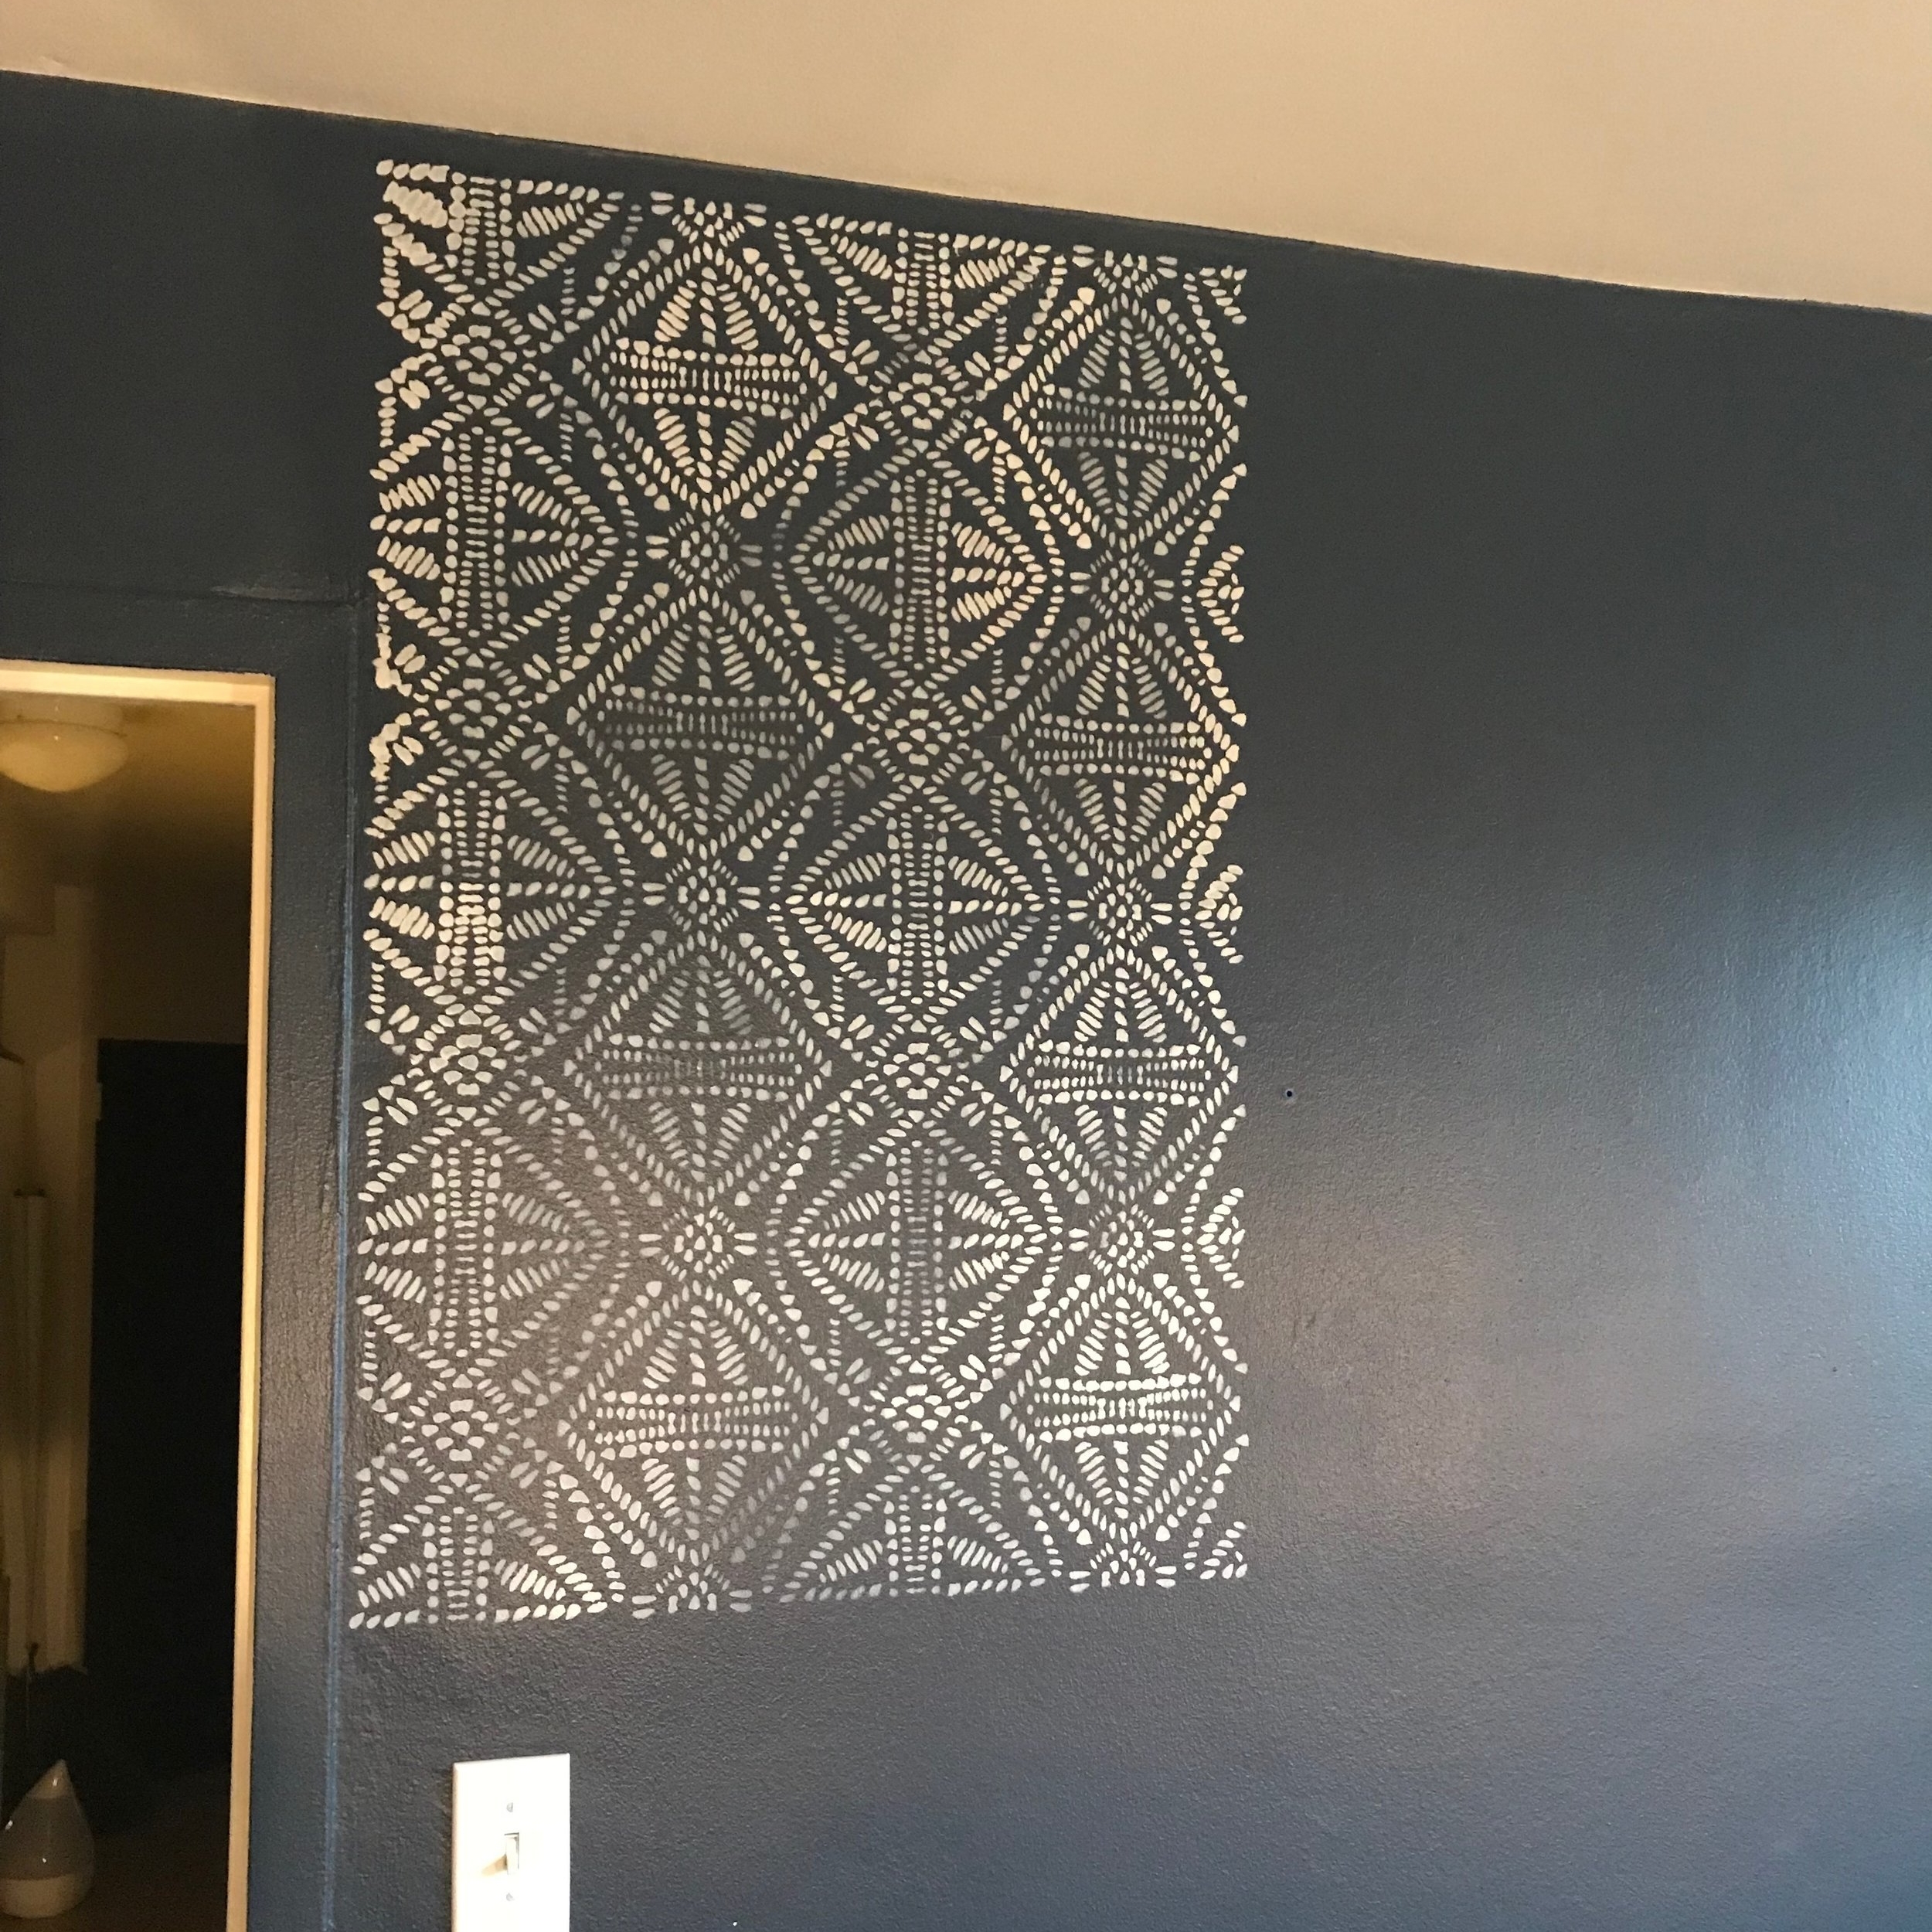
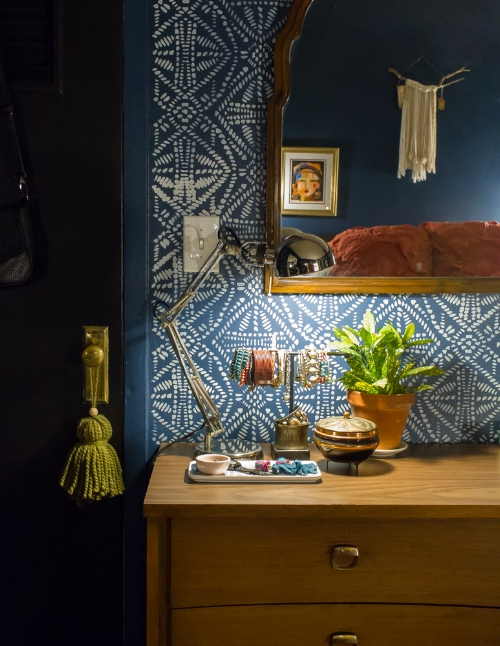
When I had finished, I had a sore arm but I also had a new, amazing accent wall. It had completely transformed my space for significantly less than the cost of wallpaper.
This is my wall before:


And here it is after:


What do you guys think? Are you planning on stenciling a wall in your home? Read up on their blog for tips and watch their Youtube videos to get a better feel on how to begin. Remember, it's just paint and it's always easy to paint over and start again if you ever make a mistake. Or if you're like me, you'll make it work regardless. Good luck!